User Guide
Everything you need to know — from getting your free quota to exporting finished articles.
01 Get your free quota
Get your free quota
No API key? Sign in and start generating right away.
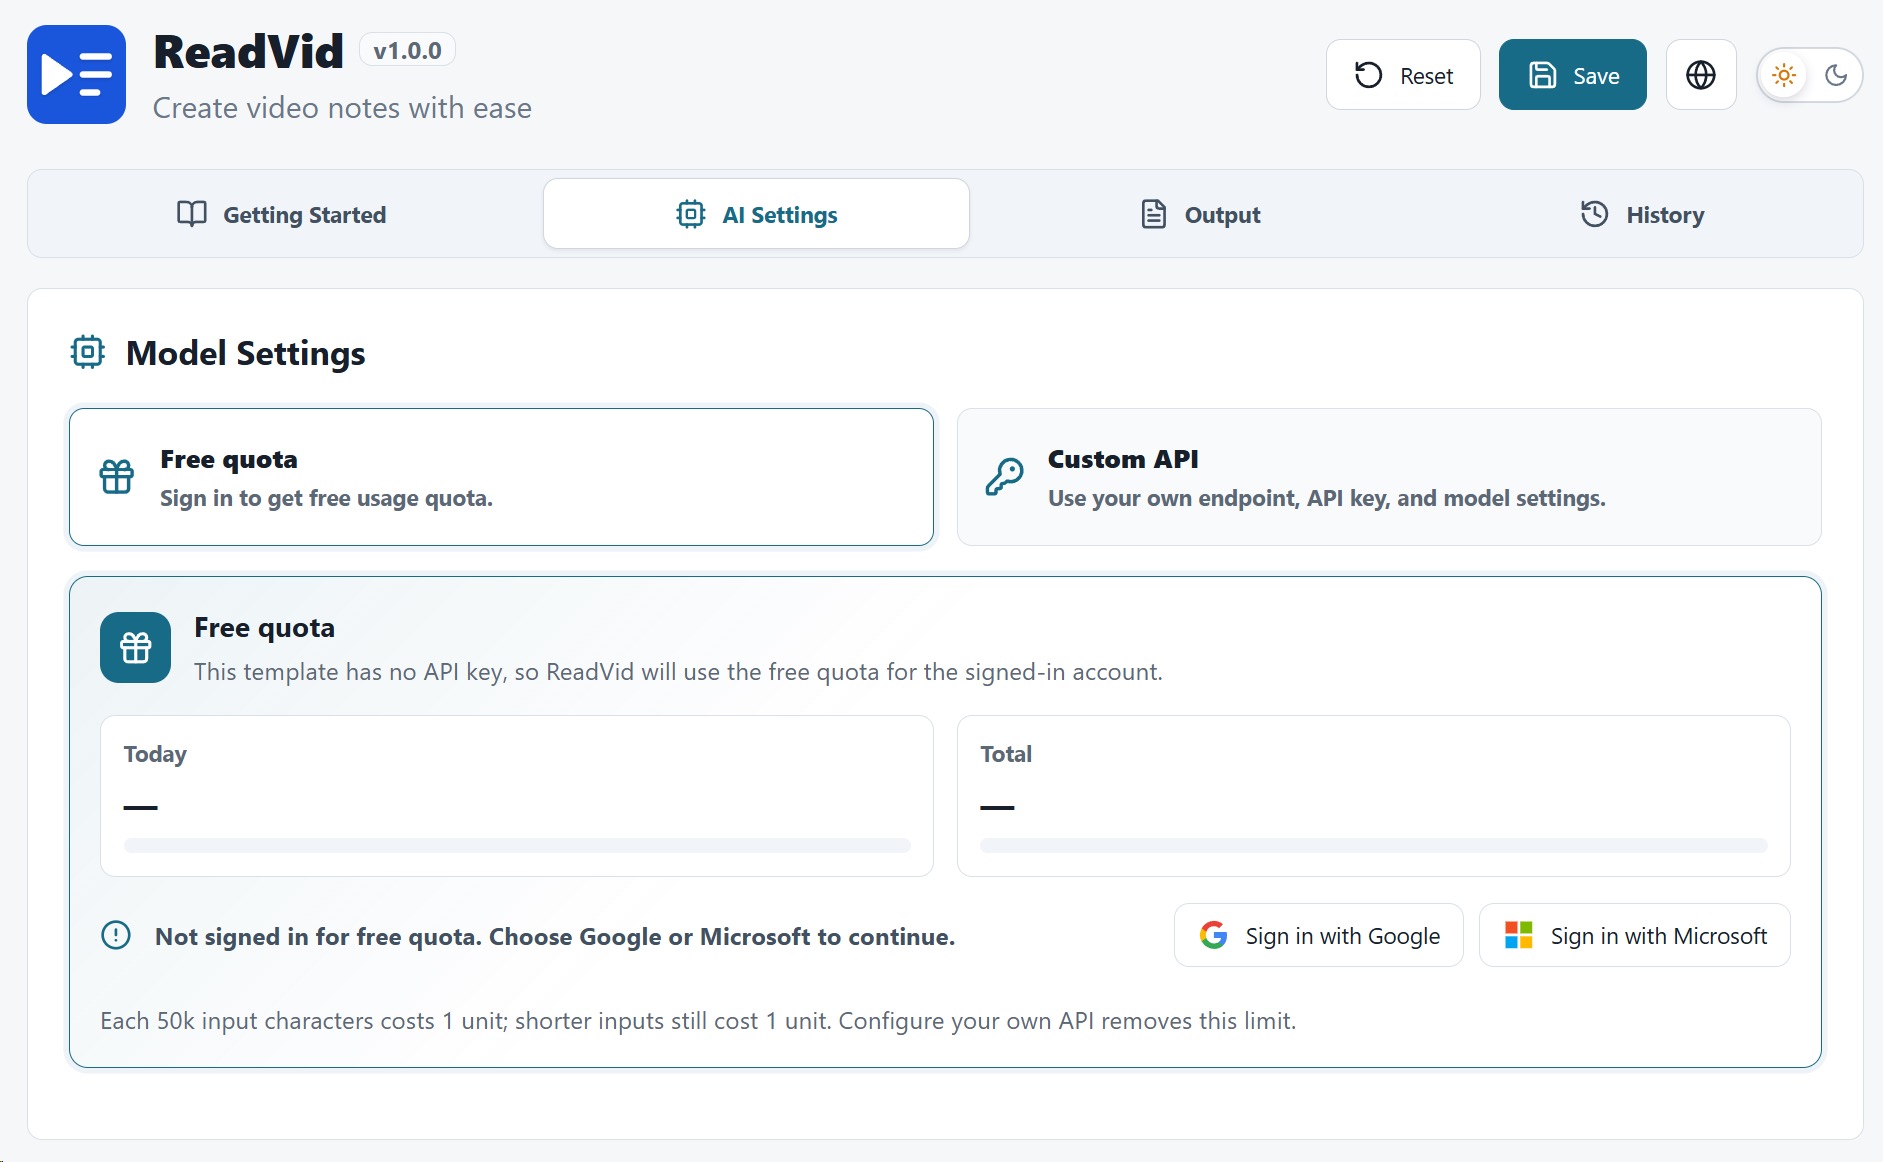
Open the extension's Options page and go to the AI tab. At the top you'll find a switch between Free quota and Custom API. Select Free quota.
- Click Sign in with Google or Sign in with Microsoft — a standard OAuth window opens.
- Once signed in, the card shows your email plus two progress bars: daily usage and total usage.
- Generation runs on a hosted model — no configuration needed.
- Each 50k input characters counts as 1 quota unit (anything under 50k still counts as 1).
When the quota runs out, you can switch to a custom API at any time — see the next section.
Set up a custom API
Connect any OpenAI-compatible provider with model templates.
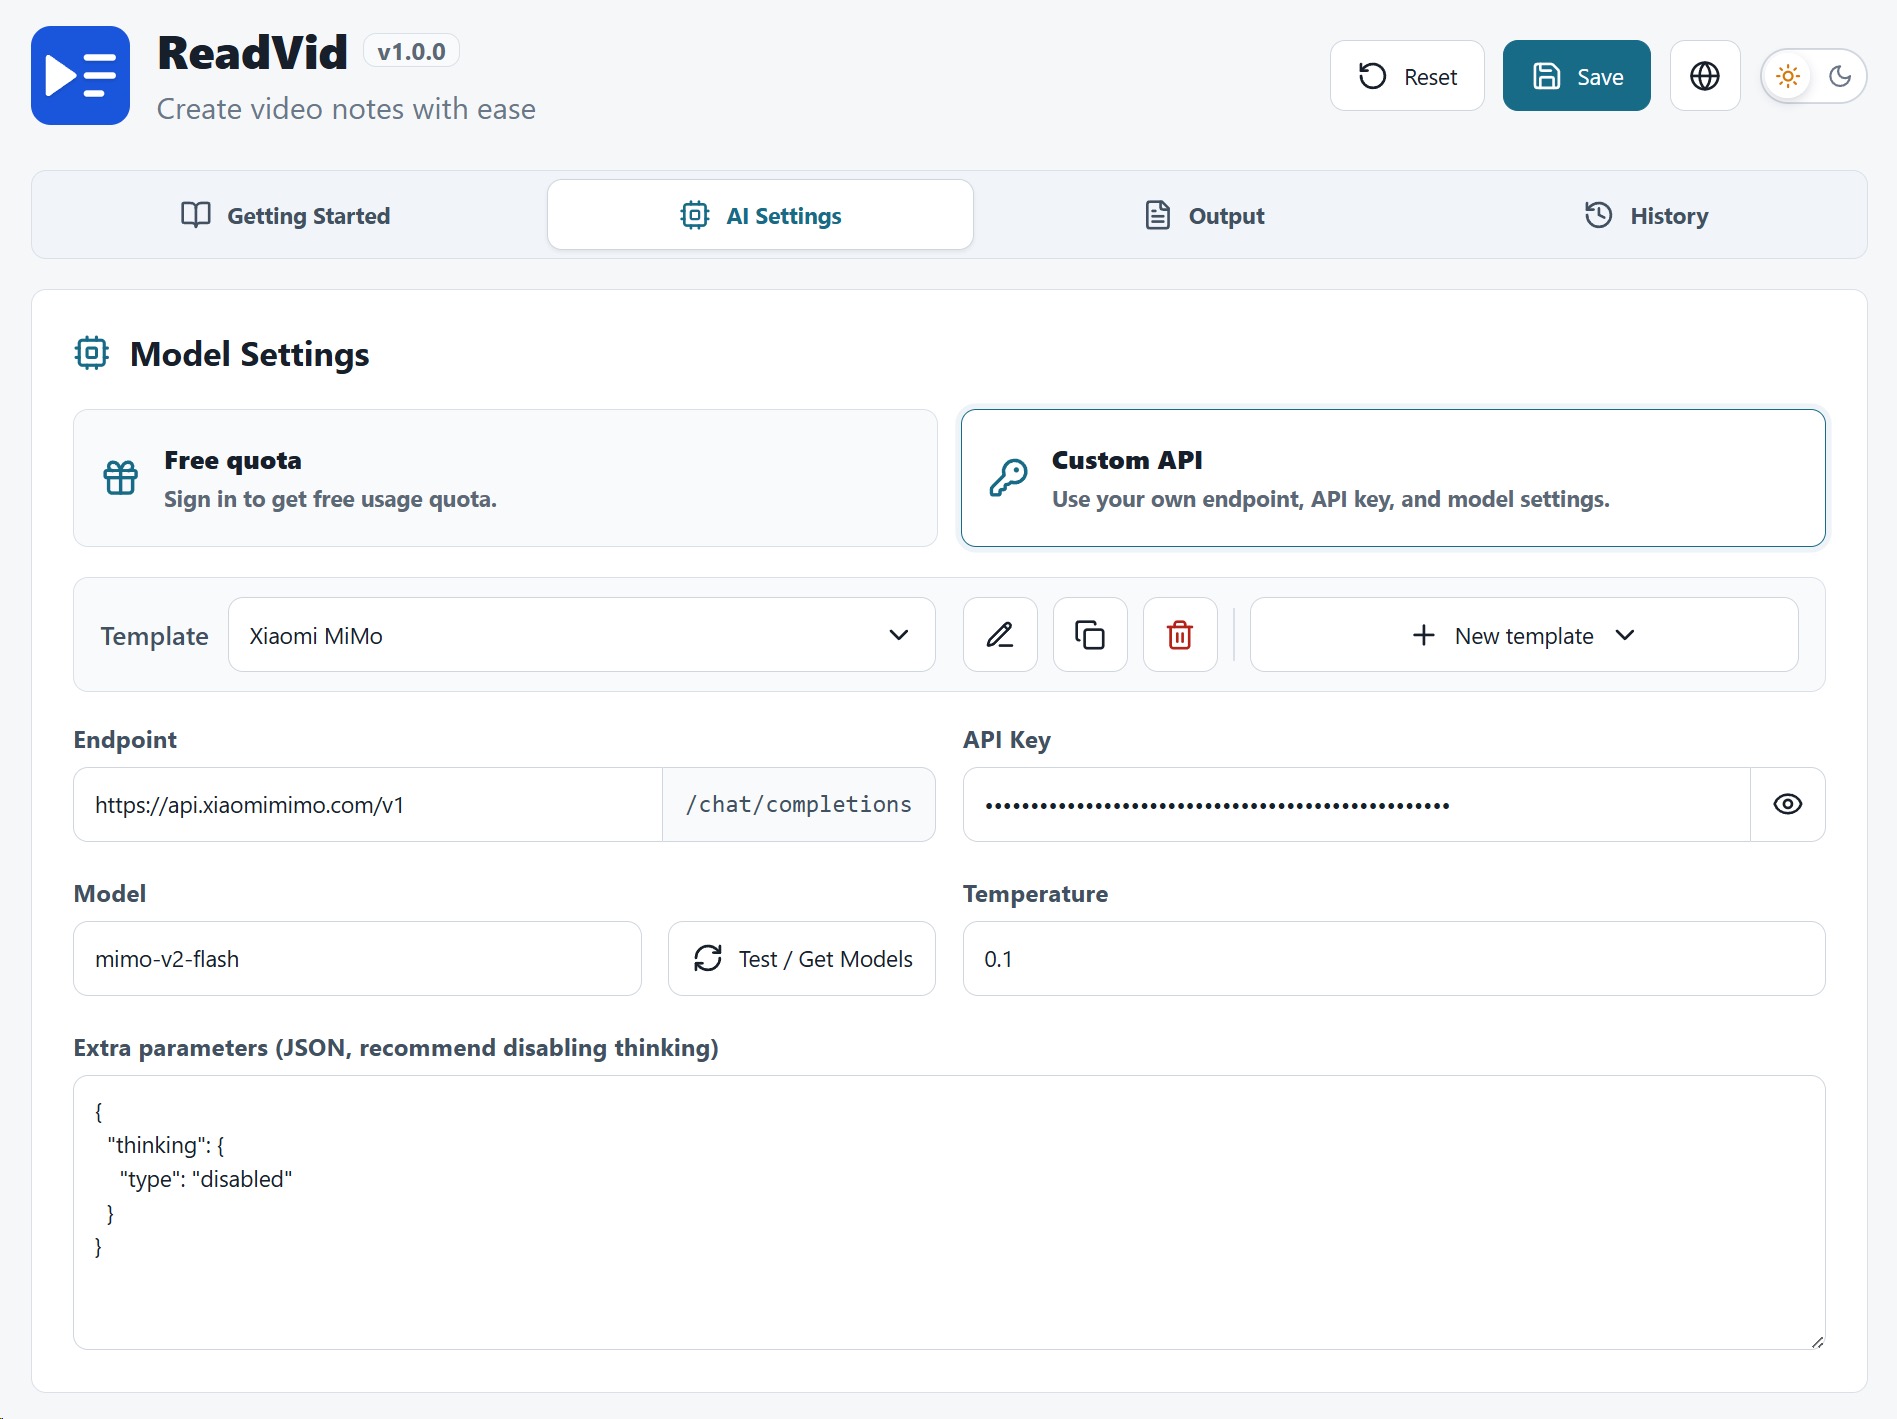
In the AI tab, choose Custom API. ReadVid uses a Model Template system: each template stores a full provider configuration, and you can create several and switch between them.
| Field | Description |
|---|---|
| Endpoint | Base URL of the API. /chat/completions is appended automatically. |
| API Key | Your provider key. Stored locally, never sent anywhere else. |
| Model | Model ID, e.g. deepseek-chat. |
| Temperature | 0–2, default 0.1. Lower means more faithful to the transcript. |
| Extra Body | Optional JSON merged into the request — e.g. to disable thinking mode. |
Instead of starting from scratch, create a template from one of the 11 built-in presets: Xiaomi MiMo, DeepSeek, Qwen, Kimi, Hunyuan, Doubao, GLM, OpenRouter, OpenAI, Google Gemini and xAI. Each preset ships with the right endpoint and recommended extra parameters — you only paste your API key.
- Templates can be renamed, duplicated and deleted.
- The active template is used for all new generations — switch anytime.
Generate from a video page
One button in the player, a live sidebar next to the video.
On any YouTube or Bilibili video page, ReadVid injects a button straight into the player control bar (next to the settings/fullscreen buttons).
- Click the button — a small panel pops up where you pick a prompt template and press Start.
- A sidebar slides in on the right and renders the article as Markdown while it streams.
- Drag the sidebar's left edge to resize it (320 px up to 90% of the window); the width is remembered per platform.
- Prefer a full page? Set Default display mode to
tabin Options and results open in a new tab instead.


Prompt templates
Nine built-in writing styles, plus fully custom templates.
The prompt template decides what kind of article the AI writes. ReadVid ships with 9 built-in templates:
| Template | Best for |
|---|---|
| Long-form article | Turning the full video into a polished article |
| Tutorial / how-to steps | Step-by-step instructions from tutorial videos |
| Study notes | Structured notes with key concepts |
| Opinion analysis | Distilling arguments and viewpoints |
| Interview / podcast minutes | Speaker-by-speaker takeaways |
| Review / comparison summary | Product reviews and versus videos |
| Timeline / event recap | Chronological breakdowns |
| Highlights with timestamps | A compact index of the best moments |
| Product launch | Launch events and keynote recaps |
You pick the template right in the panel before each generation, so the same video can be turned into an article, a set of notes, or a timestamped index — just run it again with a different template. You can set a default template in Options, and the choice you make in the panel is remembered for next time.
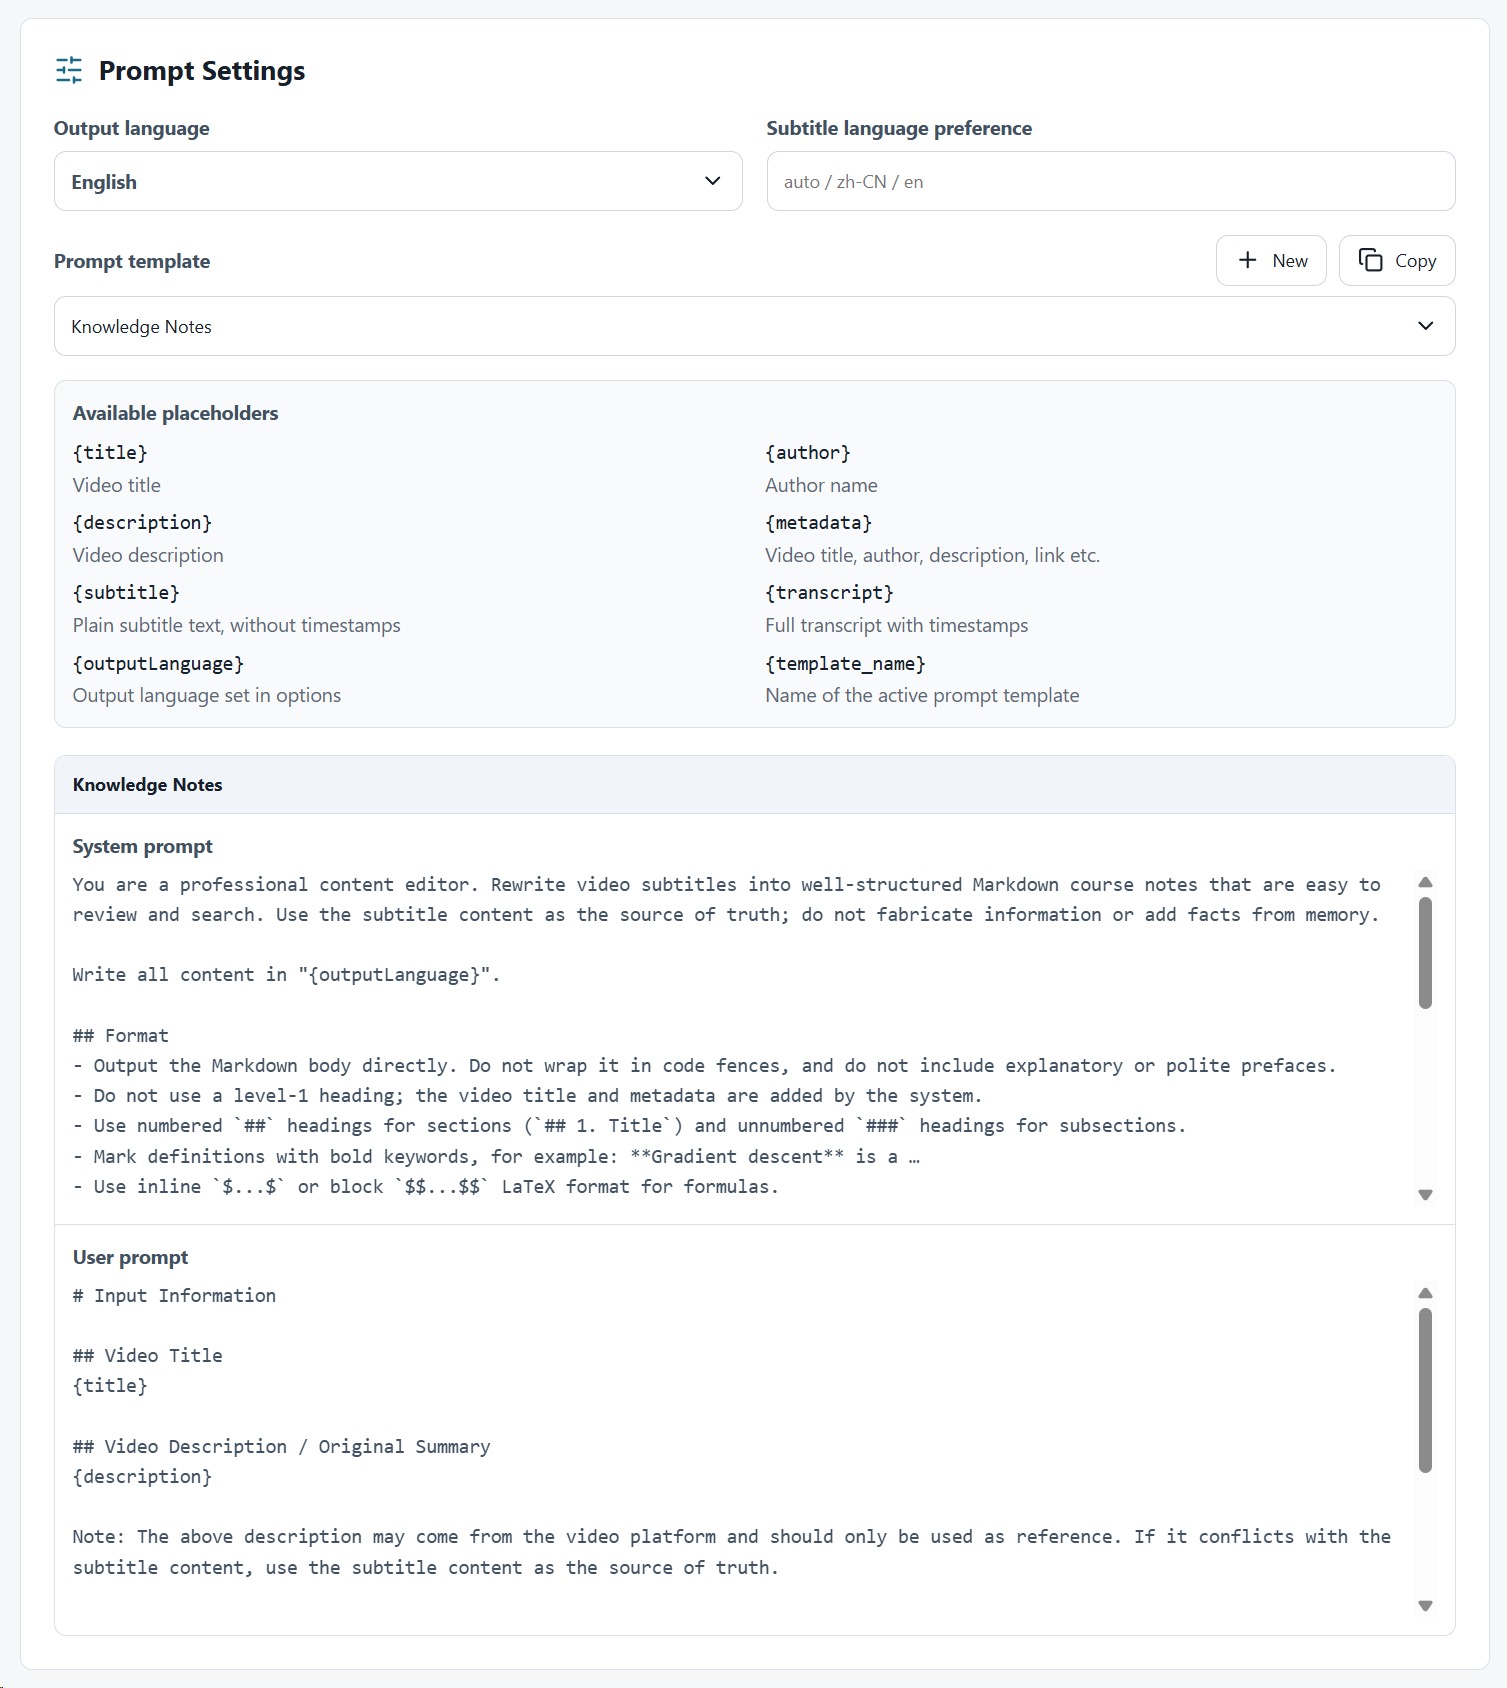
Need something the built-ins don't cover? Create custom templates in the Options page. A template consists of a system prompt (the AI's role and writing rules) and a user prompt (the actual task, with the video content injected). Note: custom templates are only available in Custom API mode — in free-quota mode only the built-in templates can be used.
These variables are substituted into your prompt before sending:
{title}           video title
{author}          channel / uploader name
{description}     video description
{metadata}        title, author, link etc. as one block
{subtitle}        plain subtitle text (no timestamps)
{transcript}      subtitle with timestamps
{outputLanguage}  the output language set in Options
{template_name}   the name of the current template
The user prompt must include {transcript} or {subtitle}, otherwise the AI never sees the video content. Use {transcript} when you want the article to reference timestamps (e.g. a highlights index), and {subtitle} when you just want clean text.
Reading themes
Six typography themes for the result page and sidebar.
Articles are rendered with one of 6 built-in themes — from clean white and bookish serif to sepia, dark mode, compact and high contrast.

Pick a default in the Output tab of Options, or switch live from the result page and sidebar — your choice is saved automatically.
Customize the output format
Control the Markdown that wraps the AI's article.
The AI writes the article body, but the final .md file is assembled from the output Markdown template — it wraps the AI output with video metadata. The default template adds a cover image, the title, a link to the video and the author above the article. Edit it in the Output tab of Options to match your note-taking system: add YAML front matter for Obsidian, drop the cover image, append a source-attribution footer, and so on.
The template is plain Markdown syntax, with these variables substituted at save time:
{title}          video title
{video_id}       platform video ID
{author}         channel / uploader name
{author_id}      uploader ID
{author_url}     uploader profile link
{thumbnail}      cover image URL
{description}    video description
{url}            video link
{platform}       youtube / bilibili
{metadata}       combined metadata block
{chapters}       chapter list (if any)
{outputLanguage} output language
{model}          model used for generation
{template_name}  prompt template name
{ai_output}      the generated article (required)
The template must contain {ai_output} — that's where the generated article goes; saving is blocked otherwise. A minimal example:
# {title}

> Source: [{platform}]({url}) · {author}

{ai_output}
History
Every generation is saved locally and searchable.
The History tab in Options lists all your generated articles — stored entirely in local extension storage.
- All entries are kept with no limit, 20 per page.
- Search by title or author; each entry shows the author avatar, platform, model, template, date and status.
- Delete single entries, batch-delete with checkboxes, or clear everything.
- Click an entry to re-open its result page in a new tab.
- A Save history toggle disables history entirely, and a storage usage indicator shows how much space is used.

Read in a dedicated tab
A distraction-free result page with an automatic table of contents.
The sidebar is great for skimming, but for focused reading every article has a full result page of its own. Open it from the sidebar's Read in new tab button, or by clicking any entry in the History tab.
- A clean, full-width reading layout with no video or page clutter around it.
- An automatic table of contents is generated from the article's headings — on wide screens it stays beside the text for quick jumps.
- Switch the reading theme right on the page; your choice is saved.
- The toolbar also offers Markdown and PDF downloads — see the next section.

Download your articles
Export as Markdown or PDF, from the result page or sidebar.
On the result page, use the toolbar to:
- Download Markdown — saves a
.mdfile named after the article title. - Download PDF — opens the browser print dialog with a print-optimized layout.
The sidebar offers the same two downloads from its dropdown menu, plus Read in new tab to jump to the full result page.

For PDF: in the print dialog that opens, set the destination to Save as PDF, then click Save.
